Checkmk Installation Guide for Beginners
Checkmk is a powerful and efficient monitoring tool designed to help IT professionals oversee their infrastructure, including servers, networks, and applications. This beginner-friendly guide walks you through the process of installing and setting up Checkmk step-by-step.
Prerequisites
Before diving in, ensure the following:
Supported Operating Systems:
- Linux distributions like Ubuntu, CentOS, Debian, or Red Hat.
System Requirements:
- Minimum: 2 GHz CPU, 4 GB RAM, and 20 GB of disk space for smaller setups.
- Recommended for larger setups: Scale resources based on your infrastructure size.
Administrative Access:
- Root or sudo privileges are mandatory for installation.
Network Configuration:
- Open ports 80 and 443 (HTTP/HTTPS) for web access.
Step 1: Download Checkmk
- Go to the Checkmk Download Page.
- Choose the appropriate package for your Linux distribution:
.debfiles for Debian/Ubuntu..rpmfiles for CentOS/Red Hat.
Step 2: Install Checkmk
For Debian/Ubuntu:
For CentOS/Red Hat:
Once installed, the omd (Open Monitoring Distribution) command becomes available for managing Checkmk instances.
Step 3: Create a Monitoring Site
Create a site:
- Replace
mysitewith your preferred site name.
- Replace
Start the site:
Note down the provided URL, typically:
Step 4: Access the Web Interface
Open the URL in your web browser.
Log in with the default credentials:
- Username:
cmkadmin - Password:
cmkadmin
Change the password for security:
- Username:
Step 5: Add Hosts to Monitor
- Navigate to Host Management in the web interface.
- Add a host by providing:
- Hostname or IP Address.
- Optional: Host Groups or custom settings.
- Deploy the Checkmk agent to collect metrics:
- For Linux:
- For Windows:
Download and run the
.msiinstaller from the web interface.
- For Linux:
Step 6: Configure Notifications
- Go to the Notification Rules section.
- Set up email or SMS notifications.
- Define conditions for when notifications are sent.
Step 7: Customize Dashboards and Reports
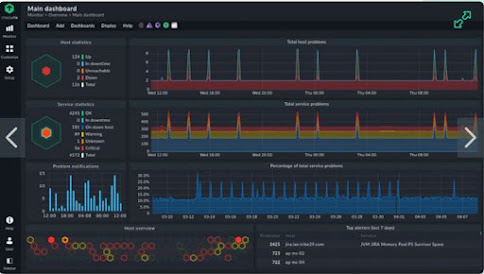
- Use default dashboards for quick insights.
- Create custom dashboards tailored to your needs.
- Generate reports to share with stakeholders.
Troubleshooting Tips
Check Logs:
- If the site doesn’t start, inspect logs in:
Firewall Configuration:
- Ensure necessary ports (e.g., 80, 443) are open.
Agent Installation Errors:
- Confirm the agent version matches your Checkmk setup.
Conclusion
Congratulations! You’ve successfully installed and configured Checkmk. Leverage its advanced features like plugins, integrations, and automation to enhance your IT infrastructure monitoring. With an active community and regular updates, Checkmk is a reliable tool for IT professionals.
For more resources, visit the official Checkmk documentation.


No comments